Skip to Main Content

Library Student Workers: Circulation Desk Projects

Desk Work

Work on the following projects when you are at the desk.

The tabs in the current projects column below are in order of importance. Check if there is anything to be done starting from the left most tab and working your way across.

Current Projects and Instructions

  • Choose one of the devices in the Public Services Librarian's office that has Digby on it.
    • The unlock code for all devices is the AU zip code.
  • Open Digby and sign in.
    • Use your AU username and password like you would to sign in for WMS.
    • Choose Nicholson Library as your branch.
  • Click on Manage Pull List
    • If the device asks, allow it to use the camera.
  • Look for any books or DVDs queued in the list.
  • Scan items as you find them and take them with you.
  • Once you have all the books take them down to the ILL desk with you and get the PALShare stickers.
    • They will be in a tray to the right of the ILL computer.
  • Place a book sticker (60 day loan) on all books and a media sticker (14 day loan) on any DVDs.
  • On every sticker put the name of the school it is going to on the Pick Up Location line.
    • Pick up locations can be found by checking the items in on WMS (easiest) or by clicking on the blue pulled hyperlink in the Manage Pull List screen of Digby (not hard, but must make sure you are reading the screen correctly).
  • Pull all the items on the Ready for Shipping - Courier shelf in the ILL area.

Please work on this if you see any books on the "Ready to be Scanned" shelf in the ILL area.

UNDER Construction

  1. Take any books on the ready to be scanned shelf into the Library Tech Assistants office.
  2. Tap the scanner screen to wake up the machine.
  3. Accept the terms and choose the "cart" method of scanning.
  4. Pick a book and look at the paperwork to see what page range you need to scan.
  5. Scan the appropriate section, making sure that the scans are legible and making any small necessary edits as you go.
  6. Once all the pages are scanned go into the cart and save the scan to the network using the TN as the file name.
  7. Place the book to the side and pick your next book.
  8. Repeat steps 4 through 7 until you have scanned all requested sections.
  9. Take all the books back to the shelves and place them on the In Processing shelf.

If there are books on the “Ready to Ship” shelf on the right-hand side they are ready to be shipped.


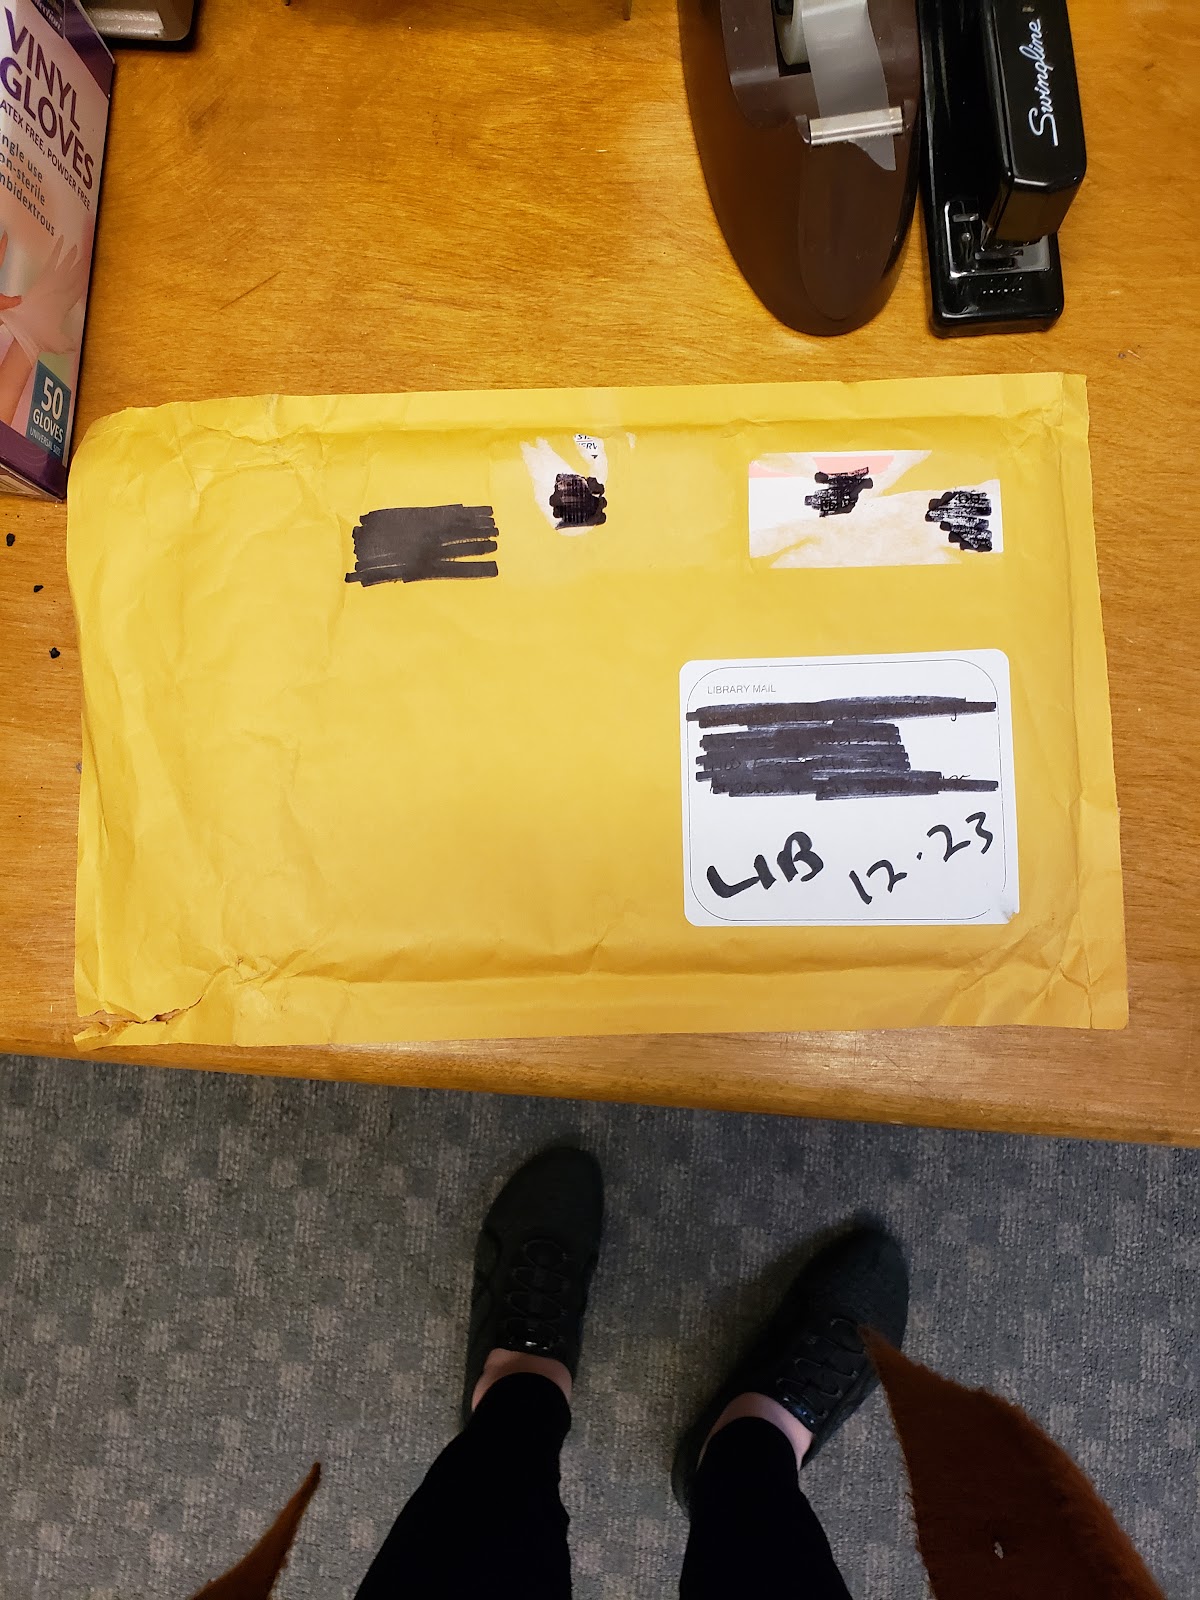
  1. Each book or rubber banded group of books should have the following: the book(s), general book paperwork, a shipping label, a tracking # sticker.

  1. Pick a box or envelope that will fit the book(s) from the Shipping Supplies shelves and make sure any old postage and addresses are either removed or completely covered in some manner. Old postage or labels will cause issues with the package getting where it’s going. 

  1. Place the book(s) in the packaging. Add padding, which can also be found on the Shipping Supplies shelves, if needed to keep the items being sent safe. Securely close the packaging with clear packing tape.

    1. Please be particularly careful when packing DVDs or other fragile materials.

    2. The tape gun has been moved to the circulation desk in the cubbies on the student worker side of the desk.

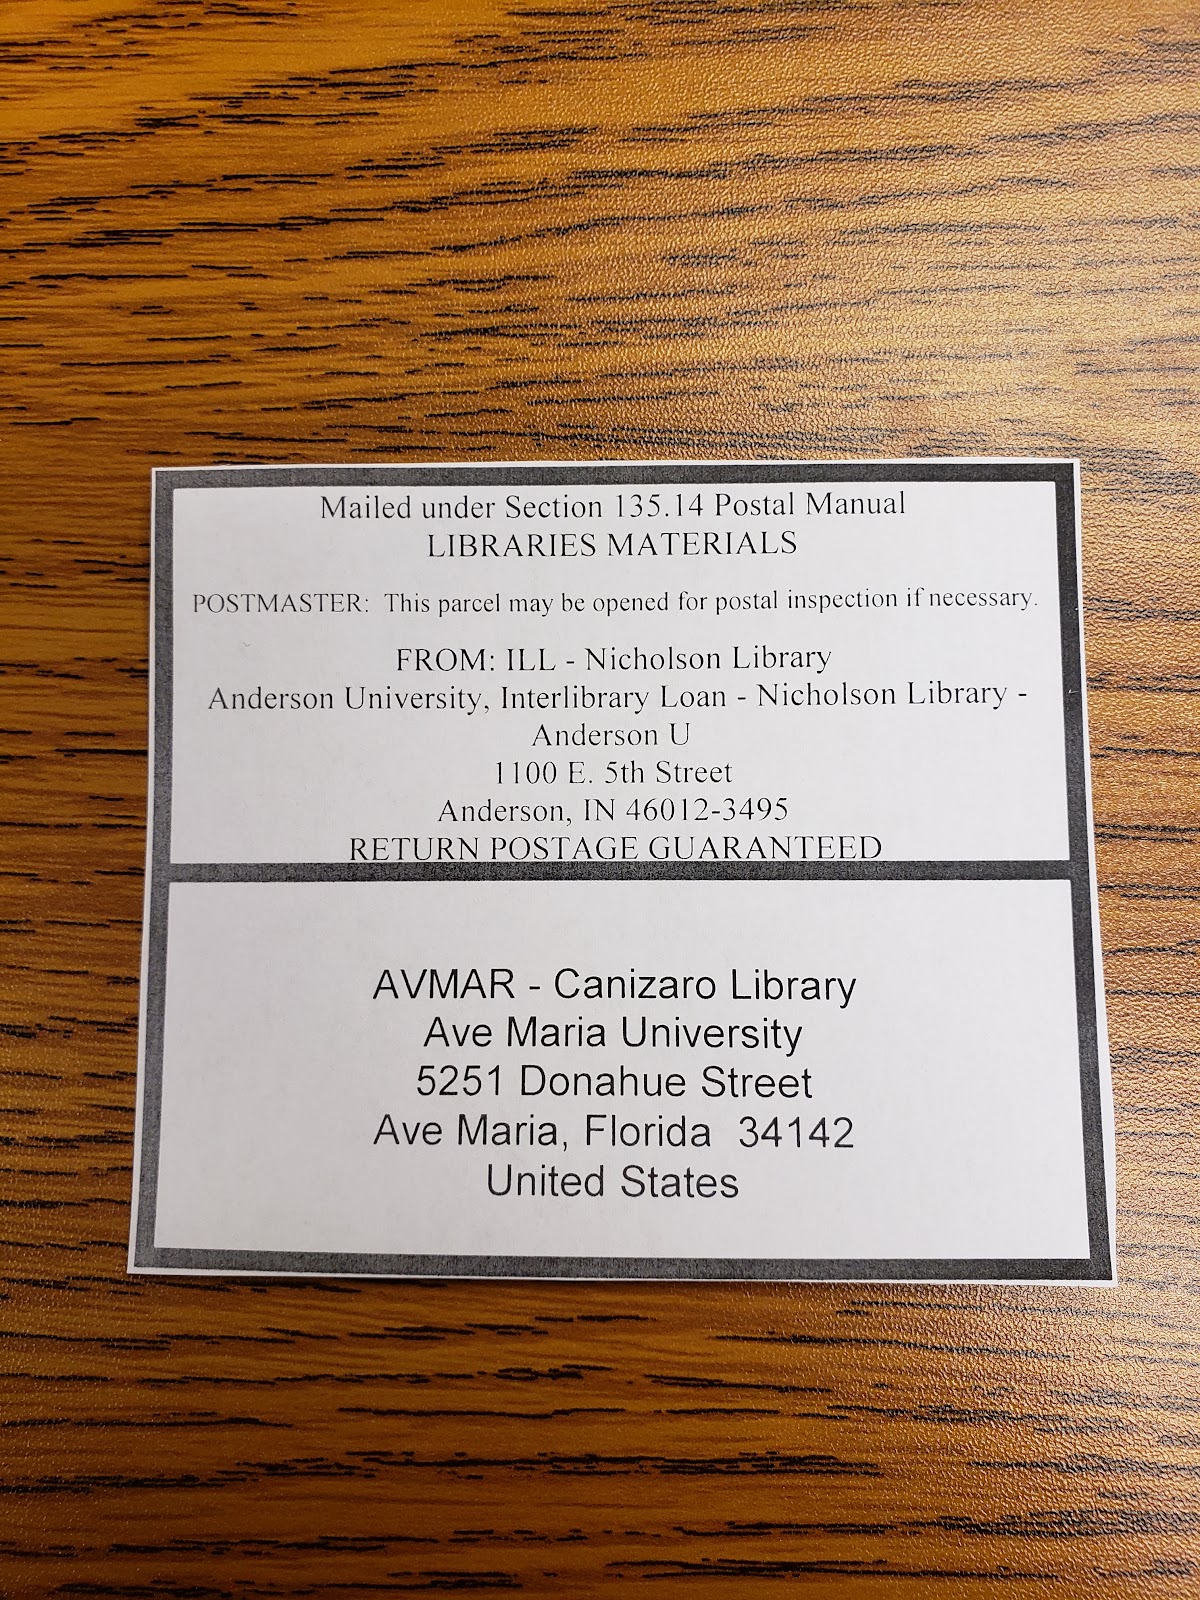
  2. Cut the address label along the black line in the middle to separate the shipping address from the return address.

  1. Tape the shipping address to the bottom center of the packaging’s top. Tape the return address to the upper left hand corner of the packaging’s top. Peel the large part of the tracking number, that includes the barcode, from it’s backing and place it on the bottom left quadrant of the packaging’s top.

    1. Make sure that the addresses are securely taped to the package. All four edges should be under tape.

    2. There should be plenty of room in the upper right quadrant of the packaging’s top for the postage that will be added in the mail room.

  2. Place the finished package in the outgoing basket by Heather’s office.

  1. Collect all of the books that are on the shelf ready to be sent out through the courier.
  2. Separate the books into pile based on where they are shipping to.
    • Read the addresses carefully, Indiana has multiple libraries with similar names. example: Anderson Public Library and Anderson University Library; Butler University and Butler Public Library
  3. Go to the InfoExpress website: https://digital.statelib.lib.in.us/infoexpress/
    • The login information is in the drawer of the ILL computer desk.
  4. Click on Parcels, Manifests & Labels
  5. Click on Parcel Manager
  6. Choose the appropriate pickup date
  7. Choose the appropriate library from the Destination drop down box.
  8. List all books going to that library in the Notes box.
  9. Click on Add New Parcel
  10. Repeat steps 7, 8, and 9 until you have create a parcel for every library you have books for.
  11. Click on View/Print Manifest & Labels
  12. Click on Print Labels
  13. Print the labels that are generated
    • Make sure that when you print the job is set to print on one side of the paper.
  14. Cut apart all of the labels
  15. Match the labels to the appropriate set of books
  16. For each book(s)/label set get one blue courier bag from the carton underneath the ILL shipping station
  17. Put the books inside the courier bag and zip it up
  18. Place the label in the clear window pocket on the outside of the bag
  19. Place each finished bag in the outgoing courier carton
  20. Once all the courier bags are in the carton update the pick up log with the date of the shipment and how many packages are in the carton
  21. Leave the pick up log on top of the carton

Please work on this for at least 20 minutes of a 1 hour shift if there are no other desk projects to work on.

  1. Open the Notes Clean Up spreadsheet.
    • LIBR Group Directory (T:) > Public Services Librarian > Notes Clean Up
  2. Open WMS and go to the Circulation Tab
  3. Go into Discover Items
  4. Copy the first barcode from the Notes Clean Up Spreadsheet and search for it in Discover Items.
  5. Click on the Edit button at the bottom of the record.
  6. Look at any notes on the record and decide which, if any, need to be deleted.
    • Notes that are informative should not be deleted. (e.g. "! New Book Shelf"; "Signed copy"; "Some damage to pg105"; "! Give to Heather upon return")
    • Notes that are not informative should be deleted. (e.g. "MICROFORMS"; "WILSON"; "NON FICTION")
    • If you have any question or are unsure if a note should be deleted, cut the line from the "Item Records to Check" tab and paste it into the "Questions" tab.
  7. To delete notes hover over the circle to the right of the note and click on it when it is red.
  8. When all necessary deletions are complete click on the save button at the bottom of the record.
  9. Once the record is saved delete that row from the Notes Clean Up spreadsheet.
  10. Repeat steps 4 through 9 until you are done.
  11. Save the spreadsheet before closing out of it.

Previous Projects and Instructions

Please work on this if you see a cart of bound periodicals along the half-height wall in the circulation/ILL area.

Preparation:

  1. Find the daily cart of bound periodicals to recycle, probably near Heather’s office.
     (Jeff will fill this cart during daytime hours.)
  2. Get a large recycle bin from the storage closet behind Jeff’s office (Room 035)
  3. Get two medium sized waste baskets (from the skylight area)
  4. Metal Utility Knife Box CutterFind the razor box cutter.

    Probably it is in the pen can on your desk.

Task:

  1. Hinge

    An Illustrated Guide to Book Terminology Part One: Book Structure (pdf) |  Bookbinding, Bound book, BooksCut off the cover and back of each periodical.  To do this, cut the inside front cover hinge, and the inside back cover hinge.
  2. Put the cover in the trash.
  3. Put the pages in the recycle bin.
  4. Repeat for each bound periodical on the cart.

Clean up:

  1. Put the empty cart near Jeff’s office.
  2. Put the recycle bin back in the storage closet (Room 035).
  3. Put the waste basket back under the skylights.
  4. Put the razor box cutter back in the pencil/pen can.